Index > Helm, the package manager for Kubernetes
In this section, we’ll introduce Helm, and use it to install NGINX, so we better can control access to the services on our cluster.
Motivation
In the previous sections, we deployed our Kubernetes app using the kubectl command line application. This was painful because we had to remember to create the deployment and the service each time we wanted to release a new version of our app. If we created any more Kubernetes resources, then we’d have to remember to manually deploy those each time too.
On top of that, we also had to remember to update the dependencies between each component/resource in our Kubernetes manifest files. Like the name of the services, and pods. If we’ve built some automation around this, then we’d need to update our scripts each time we made any changes to filenames.
The problem is that we have to remember exactly how to deploy the application step by step. Our “application” (i.e, all of our Kubernetes resources packaged together) is something kubectl has no idea about.
Helm
Helm is one of the solutions to this problem. According to the documentation:
A chart is organized as a collection of files inside of a directory.
In other words, Helm allows us to work from the mental model of managing our “application” on our cluster, instead of individual Kubernetes resources via kubectl.
One of the other features of Helm is its ability to use templates in Kubernetes resources that are part of the chart. This means you can define values in one place and share them across multiple Kubernetes resource files.
Another good thing about a common way to deploy a set of resources in kubernetes, is that the default values will be set to whats considered best practice. This default values can of course be overridden be the ones installing the helm-chart.
Before we begin you should understand three key concepts in helm. Read them from the docs or the copy-pasted text below.
Three key concepts
A Chart is a Helm package. It contains all of the resource definitions necessary to run an application, tool, or service inside of a Kubernetes cluster. Think of it like the Kubernetes equivalent of a Homebrew formula, an Apt dpkg, or a Yum RPM file.
A Repository is the place where charts can be collected and shared. It’s like Perl’s CPAN archive or the Fedora Package Database, but for Kubernetes packages.
A Release is an instance of a chart running in a Kubernetes cluster. One chart can often be installed many times into the same cluster. And each time it is installed, a new release is created. Consider a MySQL chart. If you want two databases running in your cluster, you can install that chart twice. Each one will have its own release, which will in turn have its own release name.
With these concepts in mind, we can now explain Helm like this:
Helm installs charts into Kubernetes, creating a new release for each installation. And to find new charts, you can search Helm chart repositories.
If you want to read more about helm, I recommend the docs.
Installing Helm
- Install Helm client by following the installing-helm-guide. Remember to initialize a helm chart repository and run
helm repo update. - Then test that your installation in successful by running
helm version.
$> helm version
version.BuildInfo{Version:"v3.0.3", GitCommit:"ac925eb7279f4a6955df663a0128044a8a6b7593", GitTreeState:"clean", GoVersion:"go1.13.6"}
Useful helm commands
All helm commands is described here, but some useful ones are listed below.
- helm install - install a helm chart.
- helm delete - delete a helm release.
- helm ls - lists all helm releases
- helm status - displays the status of the named release
- helm upgrade - upgrade a helm release
Let’s install something!
We are going to install nginx-ingress by using the helm chart.
- Create a folder named
nginx-ingress. - Inside that folder create a file named
values.yaml. This is the file we use to override the default settings. The default settings for this chart you can find here.
#values.yaml

# The only value we want to override is that we don't want to create rbac
rbac:
  create: false
- Install nginx-ingress with
helm upgrade.
$ nginx-ingress> helm upgrade --install nginx stable/nginx-ingress --values values.yaml

Release "nginx" does not exist. Installing it now.
...
This will install the chart stable/nginx-ingress, create a release named nginx and override the default values with values.yaml.
Lets create a hostname for the nginx-ingress
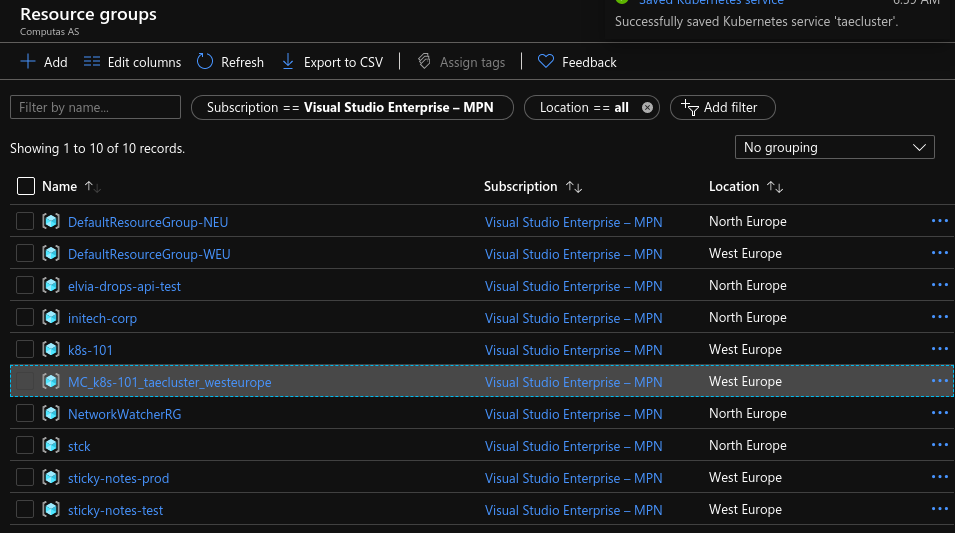
Go to the Azure portal and find the resource group containing the individual resources running your Kubernetes cluster. It has a strange automatically generated name, usally starting with “MC_”.
Find the resource of type Public ip address that is tagged with default/nginx-nginx-ingress-controller
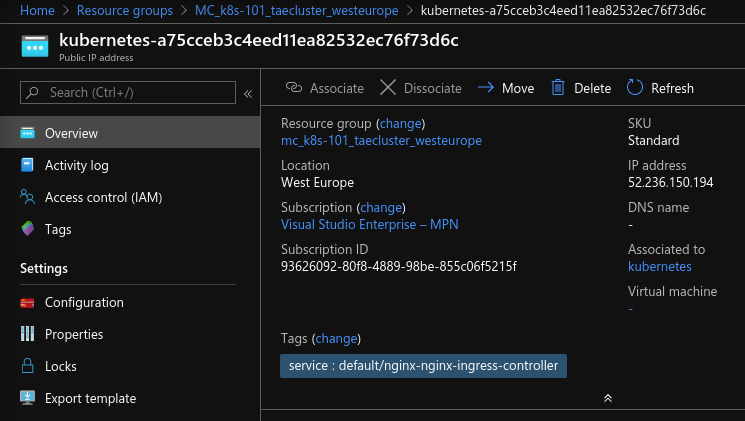
In the left menu click Configuration. Pick a suitable DNS-name (“tardis” is used as an example here), and fill in the Dns name label field. Then hit save.

Now you can reach your nginx-ingress from yourdnslabel.westeurope.cloudapp.azure.com. (For now it wil give you a 404).
Ingress and ingress-controllers
Nginx-ingress in an ingress-controllers. An ingress-controller listens to changes in an kubernetes [Ingress] and apply them to the underlying proxy, in this case nginx. An Ingress is a kubernetes resource that manages external access to a service inside the cluster. You can look at a Ingress as a routing rule, like so: “If the user navigates to hostname.com/tardis then redirect the user the the service named tardis-service`. Lets take our webpage as an example.
Create an ingress to speedtest-api and speedtest-web
In a production environment we should place all our applications behind a proxy (nginx-ingress). We are going to pace the api under /speedtest-api and the webpage under /.
Expose the speedtest-api from yourdnslabel.westeurope.cloudapp.azure.com/backend
First we need to change the speedtest-api service the be of type NodePort. This enables clients inside the cluster to reach the speedtest-api. Go to ./speedtest-api/Deployment/speedtest-api.yaml and change:
---
kind: Service
apiVersion: v1
metadata:
  name: speedtest-api-service
spec:
  type: NodePort # <-- Change here!
  selector:
    app: speedtest-api
  ports:
    - protocol: TCP
      port: 80
- Now we need to configure speedtest-api to handle the new base path. Go to ./speedtest-api/Deployment/speedtest-api.yaml and change:
apiVersion: apps/v1
kind: Deployment
metadata:
  name: speedtest-api
spec:
  replicas: 1
  selector:
    matchLabels:
      app: speedtest-api
  template:
    metadata:
      labels:
        app: speedtest-api
    spec:
      imagePullSecrets:
        - name: regcred
      containers:
        - name: speedtest-api
          image: k8s101registry.azurecr.io/speedtest-api:0.0.1
          imagePullPolicy: Always
          ports:
            - containerPort: 80
          env:
            - name: basePath
              value: /backend # <-- Change here!
Run kubectl apply, to apply the changes.
$ speedtest-api> kubectl apply -f Deployment/speedtest-api.yaml
Now we can create the Ingress. Create a new file called speedtest-api-ingress.yaml and add the following (Remember to update yourdnslabel in the host-setting).
apiVersion: extensions/v1beta1
kind: Ingress
metadata:
  name: speedtest-api
  annotations:
    kubernetes.io/ingress.class: nginx # This tells kubernetes that we want to use our nginx-ingress
    nginx.ingress.kubernetes.io/ssl-redirect: 'false'
    nginx.ingress.kubernetes.io/rewrite-target: /$2
spec:
  rules:
    - host: yourdnslabel.westeurope.cloudapp.azure.com # CHANGE HERE!
      http:
        paths:
          - backend:
              serviceName: speedtest-api-service
              servicePort: 80
            path: /backend(/|$)(.*)
Then apply the new ingress for speedtest-api to your cluster.
$ speedtest-api> kubectl apply -f Deployment/speedtest-api-ingress.yaml
Now the speedtest-api is exposed through the nginx. Test it out by visiting http://yourdnslabel.westeurope.cloudapp.azure.com/speedtest-api/swagger.
Expose speedtest-web from yourdnslabel.westeurope.cloudapp.azure.com/client
To expose speedtest-web on /, we’ll follow the same procedure as for speedtest-api. Let’s start with opening the file speedtest-web/Deployment/speedtest-web.yaml and change the following:
apiVersion: apps/v1
kind: Deployment
metadata:
  name: speedtest-web
spec:
  selector:
    matchLabels:
      app: speedtest-web
  replicas: 1
  template:
    metadata:
      labels:
        app: speedtest-web
    spec:
      imagePullSecrets:
        - name: regcred
      containers:
        - name: speedtest-web
          image: k8s101registry.azurecr.io/speedtest-web:0.0.1
          imagePullPolicy: Always
          ports:
            - containerPort: 80
          env:
            - name: SpeedTestApiBase
              value: /backend # <-- CHANGE HERE!

---
kind: Service
apiVersion: v1
metadata:
  name: speedtest-web-service
spec:
  type: NodePort # <-- Change here!
  selector:
    app: speedtest-web
  ports:
    - protocol: TCP
      port: 80
Again run kubectl apply to apply the changes to the cluster.
$ speedtest-web> kubectl apply -f Deployment/speedtest-web.yaml
As before, create a new file called speedtest-web-ingress.yaml and add an ingress configuration, quite similar to the one for speedtest-api.
apiVersion: extensions/v1beta1
kind: Ingress
metadata:
  name: speedtest-web
  annotations:
    kubernetes.io/ingress.class: nginx # This tells kubernetes that we want to use our nginx-ingress
    nginx.ingress.kubernetes.io/ssl-redirect: 'false'
    nginx.ingress.kubernetes.io/rewrite-target: /$2
spec:
  rules:
    - host: yourdnslabel.westeurope.cloudapp.azure.com # CHANGE HERE!
      http:
        paths:
          - backend:
              serviceName: speedtest-web-service
              servicePort: 80
            path: /client(/|$)(.*)
Finally apply the new ingress for speedtest-web.
$ speedtest-web> kubectl apply -f Deployment/speedtest-web-ingress.yaml
Fingers crossed, speedtest-web will be available at http://yourdnslabel.westeurope.cloudapp.azure.com/client/index.html.
What now?
If you have gotten this far, contact Teodor and Simen for more ideas to play with on your cluster.